| The purpose of this guide is to explain a particular map as detailed as possible with the necessary images and information. If there is anything you do not agree with on this guide, feel free to add it to the talk page before posting it into the guide! |
Basics[]
- Having a basic Zombie Escape gameplay experience before playing this map is highly recommended for the higher levels!
- Knowing how to use items (By default it's pressing 'E')
- You must have NO knowledge about the Lord of the Rings series at all.
- Some free Hard Disk Space (around 200mb) since it is a gicantic map.
- Read the weapons articles to set up a good weapon-set before playing.
- It can be very, very helpful if you play the map once on your own to learn all the spots and routes on each different level.
Important information[]
Here is a list of imporant information that you SHOULD know before playing this map:
Spawns[]
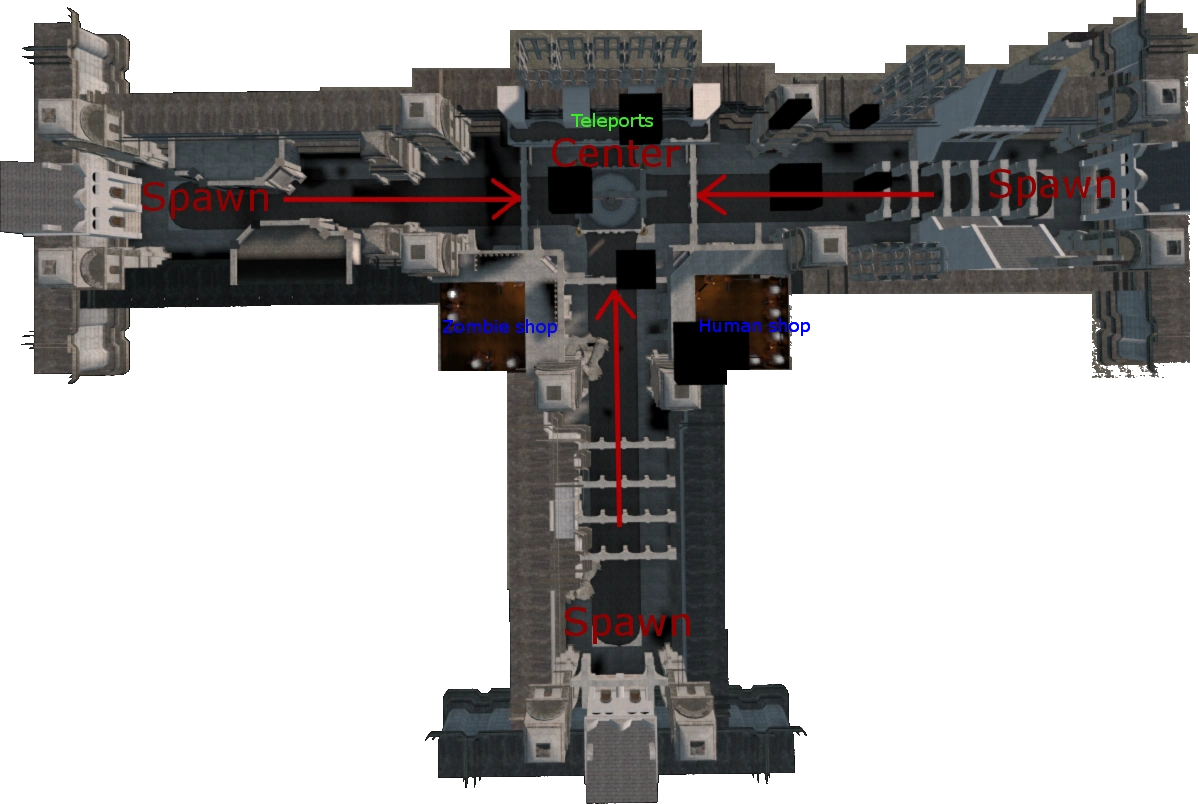
There are always 3 spawns at the beginning of each round which all lead to a central point were massive teleportation to the current stage takes place:
At the spawns:
- You will always receive the .40 Dual Elites on start of every round.
- You can always buy weapons and equipment everywhere on the spawn map before you teleport or get teleported. Once teleported, there is no turning back.
- You can go to either the human shop or the zombie shop depending on what you are selected for.
- All humans and zombies left behind in the spawn will automaticly be teleported at the zombie teleport location.
- Zombies and/or humans who die will be ressurected at the spawn. There is a teleport which will directly teleport you to the current part of the round.
Levels[]
- There are 4 stages divided in 2 modes:
- Normal Mode
- Level 1: Osgiliath
- Level 2: Main Gates
- Level 3: Catapults
- Level 4: Last Stand
- Normal Mode
- Extreme Mode
- Level 1: Osgiliath
- Level 2: Main Gates
- Level 3: Catapults
- Level 4: Last Stand
- Extreme Mode
Items (Pickable and droppable props)[]
Informations about Items[]
There are a lot of items on Minas Tirith which can be picked up by players. A frequently asked question is: "How do I pick up items??"
It's very easy: You drop your pistol which you are holding, and then walk through the item/prop. If you have re-picked a pistol and the object is following you, then you picked up the object. If you want to drop it again, simply drop you pistol.
There is a difference in dropping your item and placing it:
- Dropping your item is simply dropping your pistol but this doesn't mean you placed the object attached to it. You will still be able to walk through it or pick it up again
- Placing your object is placing that item somewhere on the map as well as making it solid so zombies cannot walk through it or have to jump over it.
To PLACE an item, look a bit down to ground (not completely) or look at the bottom of your item and then press 'E' (You may have to press 'E' twice or more in order for it to spawn). You can practice this on your own to learn placing objects quickly and efficiently.
List of Items pickable[]
I will give here the list of the differents barricade pickable. The less strong to the most powerfull:
- The hay bale stack
- The barrel
- The wooden bench
- The wooden plank
- The table
- The box
- The shelf
- The little block
- The big block
- The metal grid
- ... And the TOILET
- The last one is a secret barricade, that is once in each Stage (2-3-4 sure, but not 1). Really long to break with a knife, so it's a good idea to put it in portals for zombies (ex: Nazgul portal)
- You can also find torchs, in some Stages, which repel a little zombies if dropped.
Characters/Player level[]
Informations about levels[]
In ze_LOTR_Minas_Tirith, there is a player-based level system which can grant you special items and characters each time you win a round. It goes as follows:
- Every time a player wins a round (As CT), he/she wins 100 points
- To see at which level you are, look at the scoreboard.
- If your score ranges from 90-110, you are level 1
- If your score ranges from 190-210, you are level 2
- If your score ranges from 290-310, you are level 3
- If your score ranges from 390-410, you are level 4
- If your score ranges from 490-510, you are level 5
Note: Jump at the end of a stage (when you receive points), can glitch your score and give you extra points. But don't think you can directly take the White Knight, the points change nothing to your level.
After reaching level 5, all wins after will still add up to your score but won't count as an extra level, meaning level 5 is the maximum. If you win the very last round (Level 4 at Extreme Mode), you will receive a very high score (+1000 points). Still, you won't get any extra items or characters. This score is merely for prestige to show all players who won the last level. This is also good for players who still have a very low score even at the end, still giving them a chance to aquire the special items/characters after all the 8 stages ended.
Characters for Humans[]
There are 7 characters for humans and it can only have 1 of each characters per round for most of them:
- [Level 1 required] The Flag: 3-4 per rounds. It give you 200 HP, and nothing more.
- [Level 2 required] The Armor: 2 per rounds. It give you 325 HP, a protection against zombies, and a little knockback. If the zombies hit you 6 times, you lose your armor and get Invulnerability + Speed for 2 seconds to escape from zombies. You can't place barricades while holding the armor.
- [Level 2 required] The Ammo Barrel: 1 per rounds. It give you 125 HP. Do a Right Click, spawn a barrel, that give Unlimited Ammo for players around and Grenades if you go on it. 30 seconds of cooldown.
- [Level 2 required] The Oil: 1 per rounds. It give you 125 HP. Do a Right Click, put a pool of oil on the ground. When hit by a grenade, it will ignite and burn all zombies passing through it. 30 seconds of cooldown, when you used the 2 oil.
- [Level 3 required] The Horse: 2 per rounds. It give you a big speed, 50.000 HP, (so you can't die from fall), and a little knockback on zombies. Don't think you can't die.. The horse is the worst item against any explosion, meteor or Troll:
- The zombie barrel can kill him instantly when it explode.
- One hit from the Troll, and the horse die.
- A little part of the meteor touch you, and you die.
But if you survive at the end of Stage 4 with it, you can easily win. You can hardly place barricades with the Horse (need to jump to place them).
- [Level 3 required] Gandalf 1 per rounds. It give you 50.000 HP and a good protection against zombies (but not against trolls). You have 2 powers:
- The Light: Do a Right Click, to be surrounded by a light, zombies can't touch you, and you become invulnerable from Meteors / Balrog, when performing it. Cooldown of 60 seconds.
- YOU SHALL NOT PASS: "Press" DAWDS (not really press) quickly, on your keyboard, to perform this attack. It will repel all zombies around. When doing it, you become invulnerable from any attack. Depending of your Ping, the attack can be finish when the animation is finish or 1 sec later. It can change everything, since at the end of the attack, you can die from Troll/Balrog/Nazgul/Meteors.
- [Level 5 required] The White Knight: 1 per rounds. You can read all information on the page speaking about the White Knight .
Characters for Zombies[]
There are 6 characters for zombies:
- [Level 1 required] Zombie Flag: Give 7500 HP and extra speed.
- [Level 2 required] Zombie Barrel: The zombie can launch/place a barrel on the ground, that will explode, and break barricades / kill humans. Left Click, to switch between Launch and Place (when you see the arrow, you are in Launch mod). Right Click to Launch / Place it. Cooldown of 30 seconds.
- [Level 2 required] The Ladder: The zombie can place a ladder, to skip barricades / walls. Cooldown of 10 seconds but you can't place a lot of ladders.
- [Level 3 required] The Troll: The Troll have extra HP, and a mace. He can quickly break barricades and kill guards with his mace, when you do a Right Click. It's possible to glitch it, and so have no knockback (admins punish the use of the glitch).
- [Level 5 required] The Balrog: The giant fire demon... He has so much HP (can't give the precise number), he need 3 NUKE of the White Knight to die. He has some powers:
- He has no Knockback (except from DAWDS attack), but can't jump high.
- He break & kill barricades / guard, he walk on.
- Players in his feet, lose 200 HP per seconds.
- Left Click, for Sword Attack. It kill all humans in his way
- Right Click, for the Roar. It give all zombies nearby super speed, during 10 seconds.
- [Level 0 required] The Nazgul: The Nazgul can only be get at Stage 1 & 4, by going into the Glowing Portal. The Nazgul fly, and kill (not instantly if more than 100 HP) humans, in his body or when you do a Left Click. You can glitch the Nazgul by using the knockback you get from Humans shots, when turn at 360°. It give you a better speed for one second, and you can easily kill humans by this way.
- Note: Admin ban the glitch depanding on the servers.
Guide[]
Warm-up round[]
Every first round of the map is a warm-up round in which all the techniques summed up above are briefly explained. During that time, you must hide from zombies at the spawns location until the time goes up (1.20 mins). When the timer reaches 0, everyone is slayed and the humans win if at least 1 player survives.
|
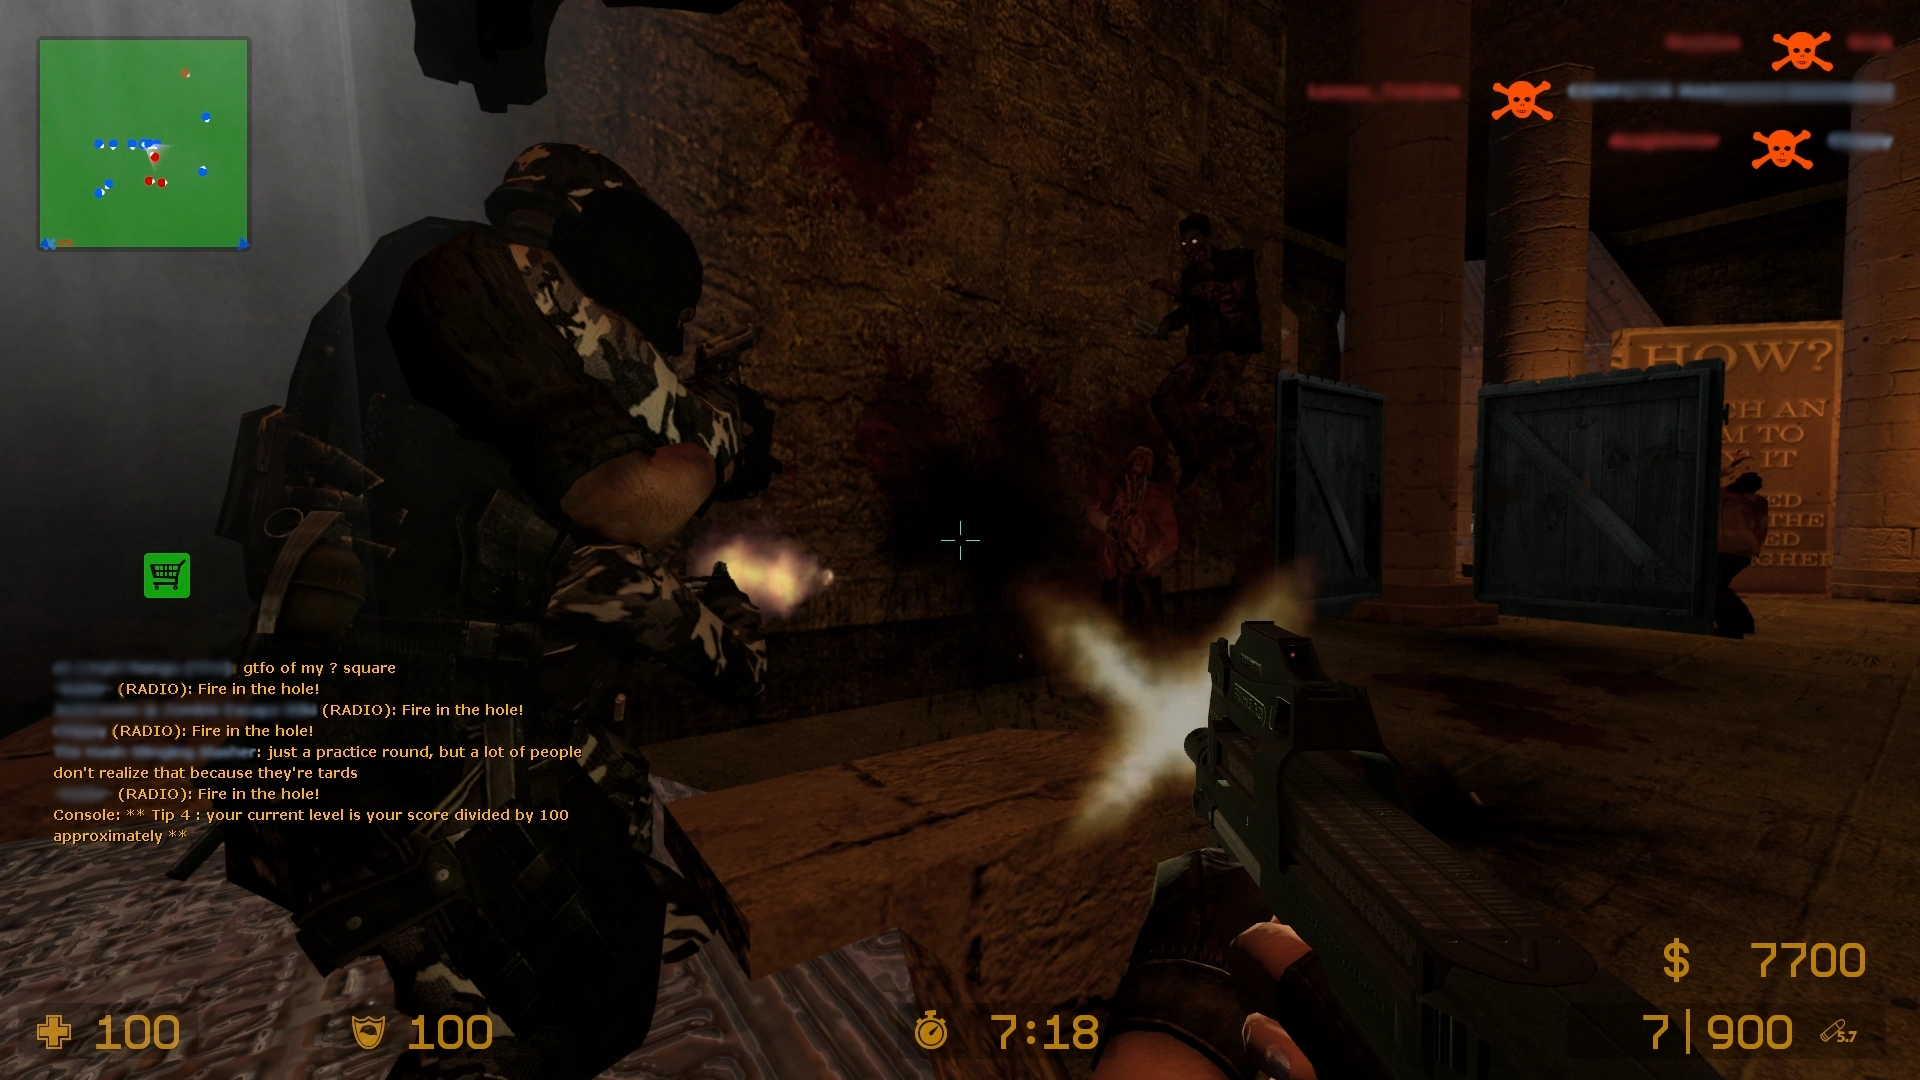
- There is a well-known trick that can almost always guarantee your 'survival' through during the warm-up round.
All players should immediatly run towards the Human shop (where you can get the special items or characters) and then stand in any of the spots. Zombies are likely going to go run there too, but they won't be able to zombifie humans because they will be pushed back by the triggers which prevents them to take the human items. - Running in the open and trying to avoid all zombies is very unlikely to succeed. There are some players who can jump onto other difficult-to-reach places, but those are very rare and require a high amount of accuracy. The above method is the recommended one.
Please note that you cannot get any of the special items/characters on the warm-up round, you can only stand into the spots.
The purpouse of this Warm-Up round is to make sure almost all the players have loaded the map by the time Stage 1 starts. The map size is very big and may take more than 1 minute to load on slow computers. Why bother with all this? Because winning Stage 1 gives winning humans +1 Level, and it would be unfair if this round was started (and won) while many players were still loading the map, thus completely missing the chance of getting that level-up.
1st Stage: Osgiliath (Normal Mode)[]
After the warm-up round, you will now need to wait at the central place for the teleporters to open. They will always open before zombies have a chance to zombifie players which are standing at the teleports (on the moment of opening).
 |
Wait for the teleporters to open.
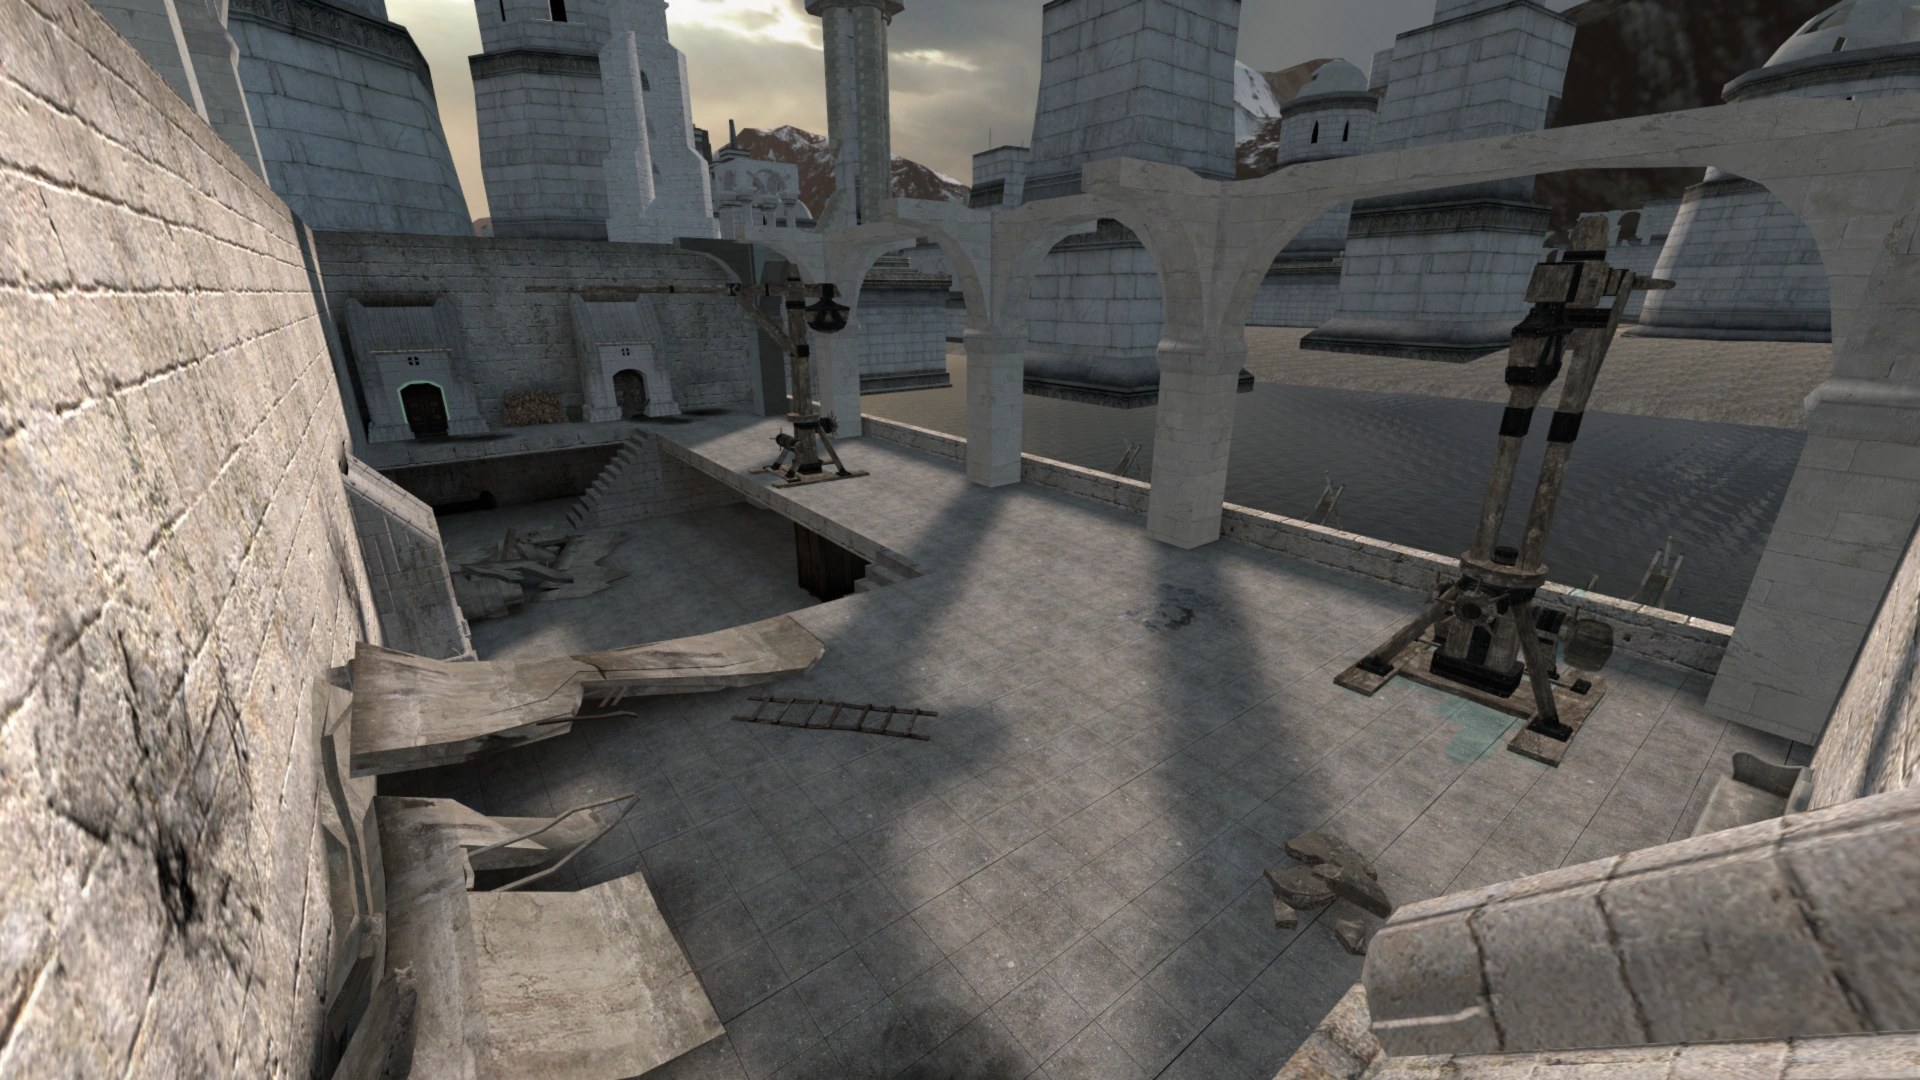
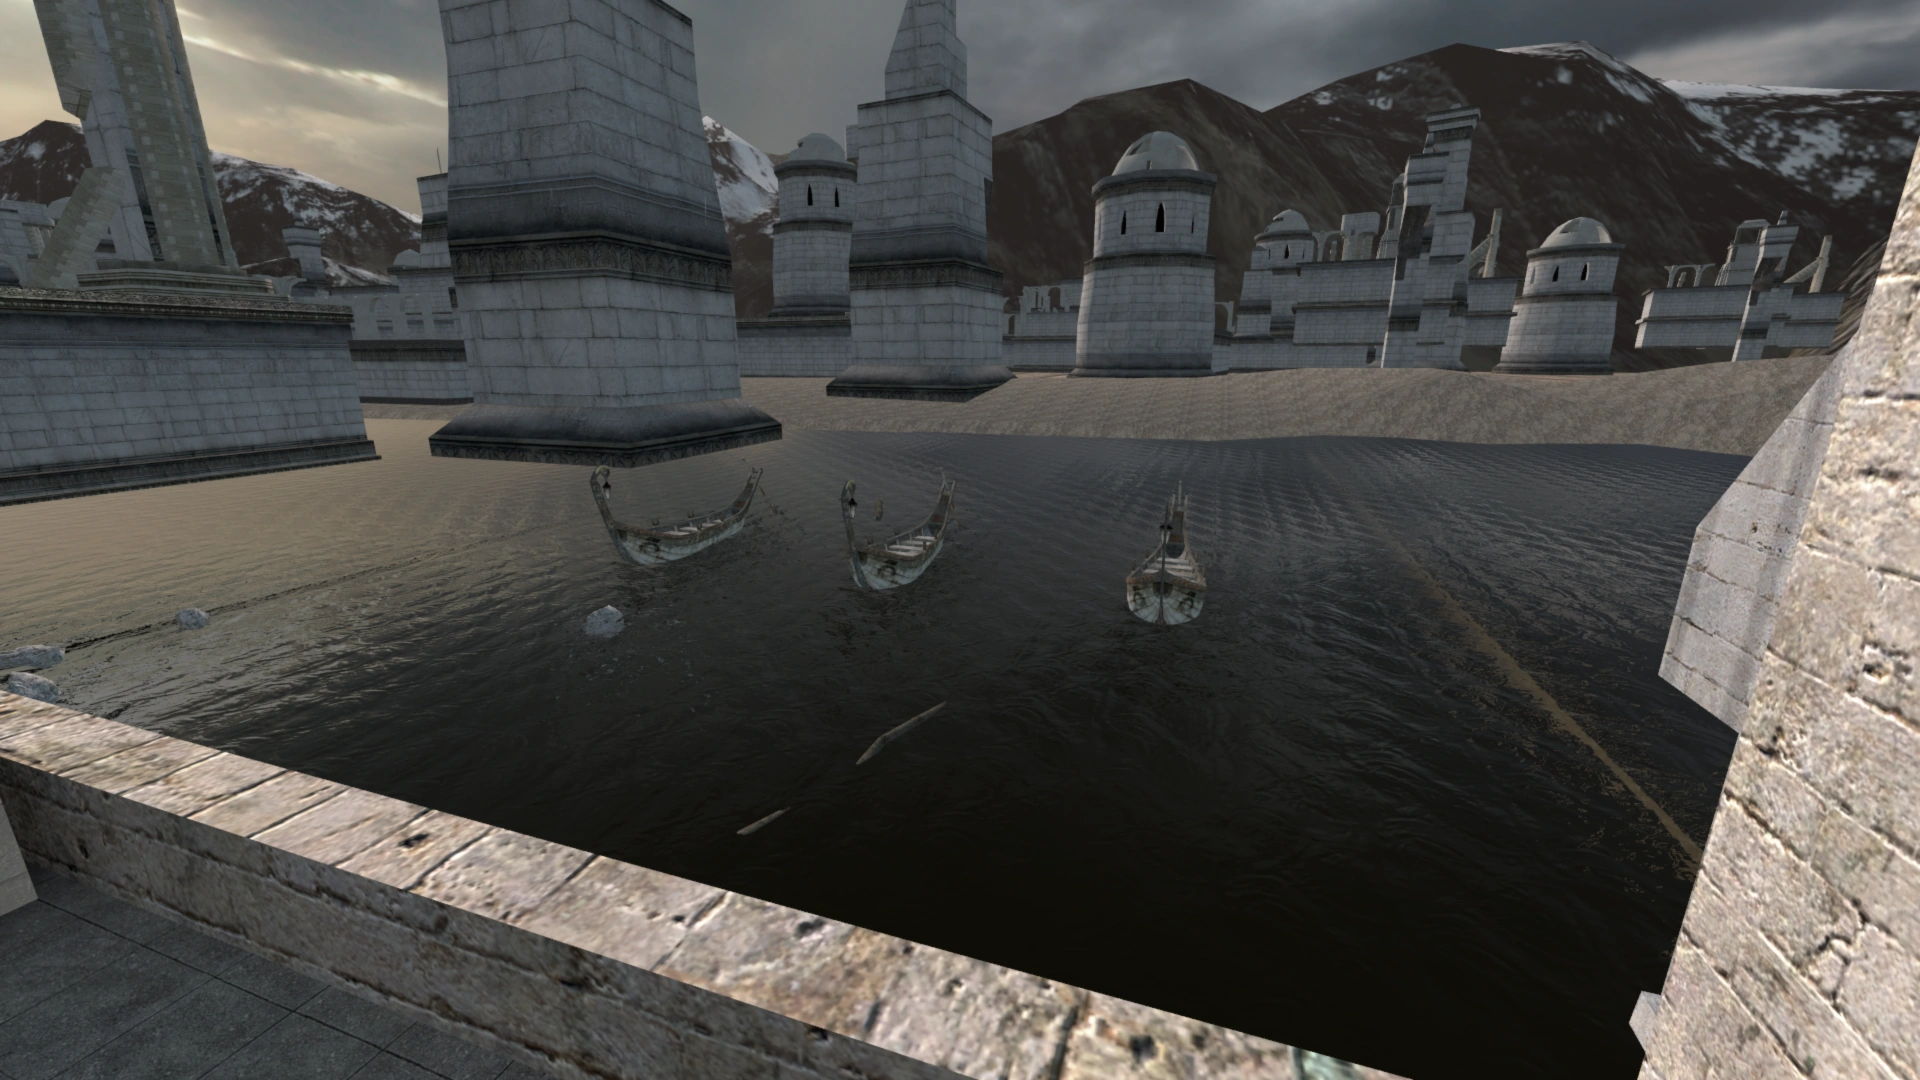
Taking any of the three teleports will bring you to Osgiliath. Humans will get teleported on any of the 3 levels in the fort at the water side, while zombies will get teleported on any of the three boats, sailing towards the fort.

|

|
|

|
|
These are all pictures of the fort in Osgiliath and the boats for the zombies.
Once there, you can pick up a total of 2 big crates, 3 barrels and 1 wooden table. 1 player should barricade the (only) stairs which give access to the middle level of the fort to slow down zombies significantly. This should only be done with 1 well-placed crate, because you'll need to save another big crate for later in the level! (Some player prefer to barricade the stairs at 8:00 minutes to prevent players from shooting the barricade) (This is very important!)
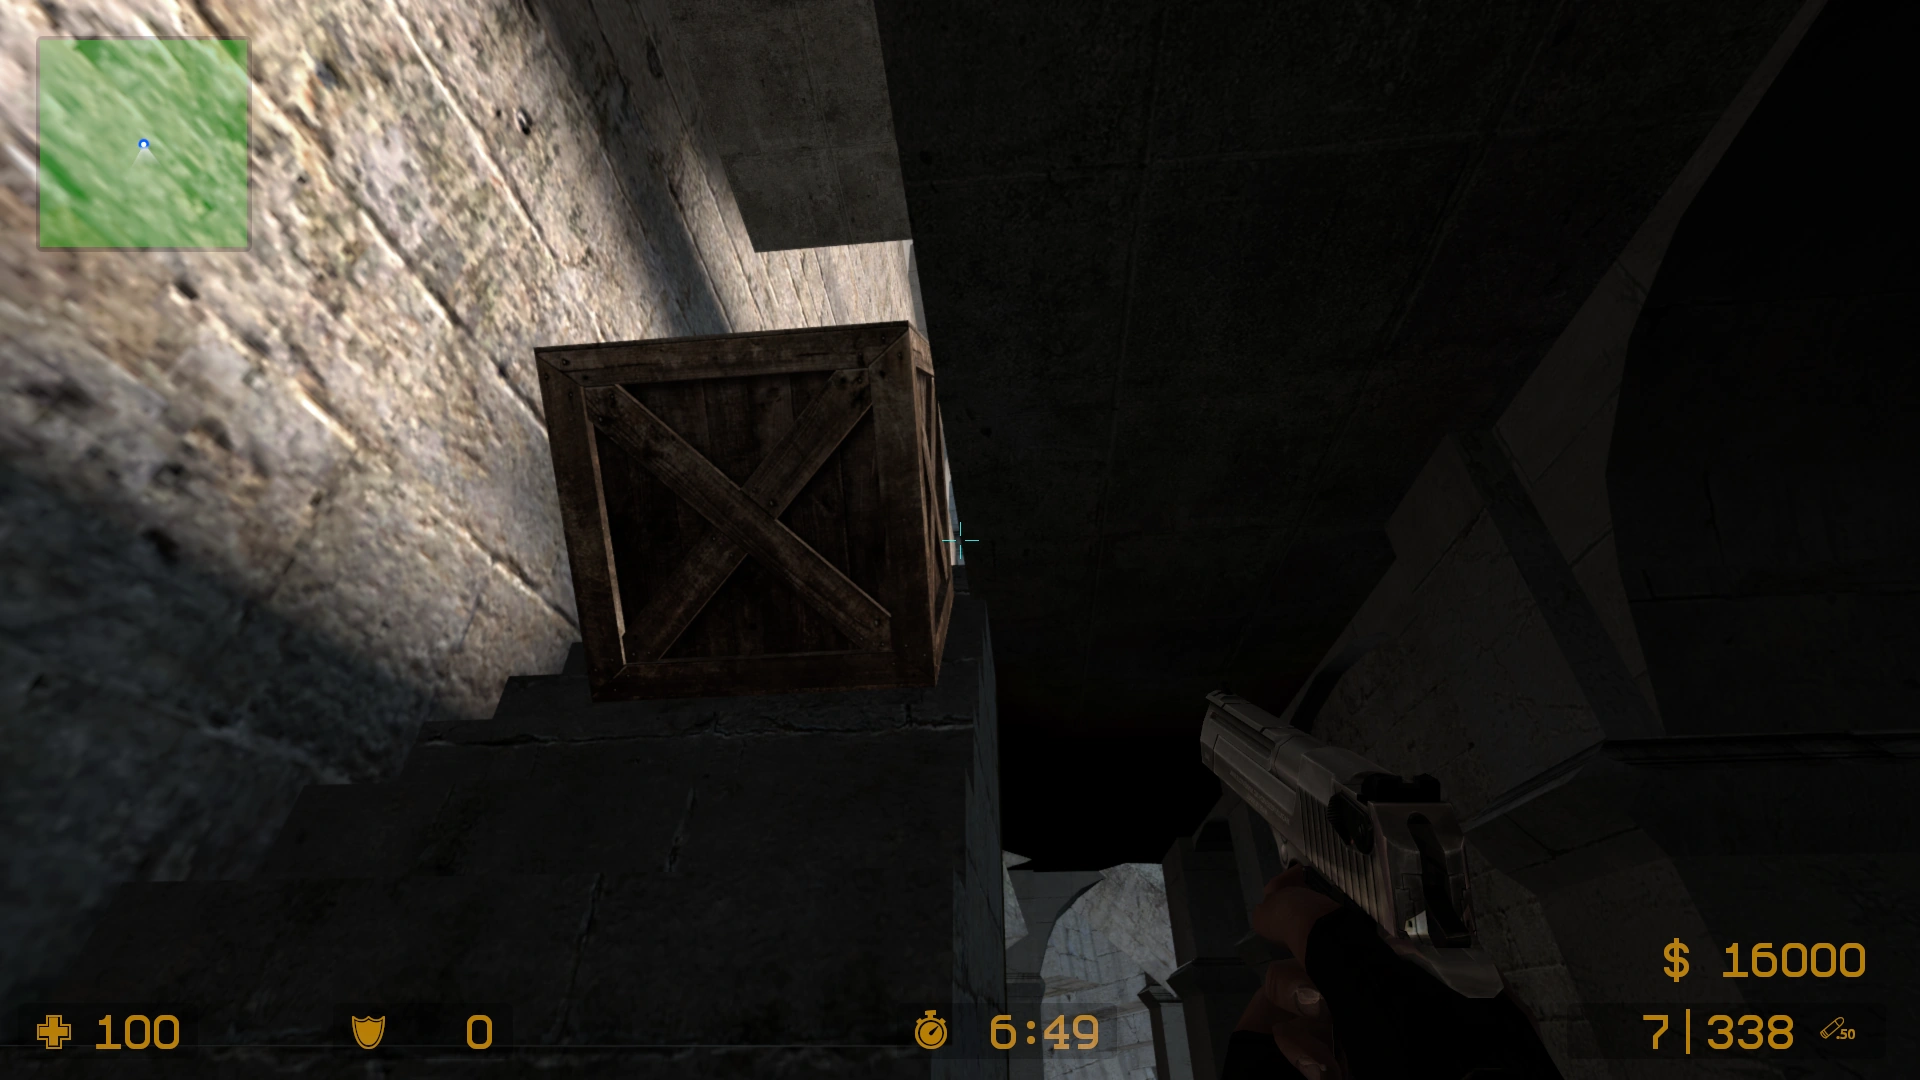 |
The crate can slow down the zombies by a long shot.
Alternativly, you can place the bench at the upper part of the stairs and place a barrel at the right side of the stairs so zombies cannot bypass the table by jumping on the right (look at the picture). But in the v3_3, keep the bench, it is needed for the end.
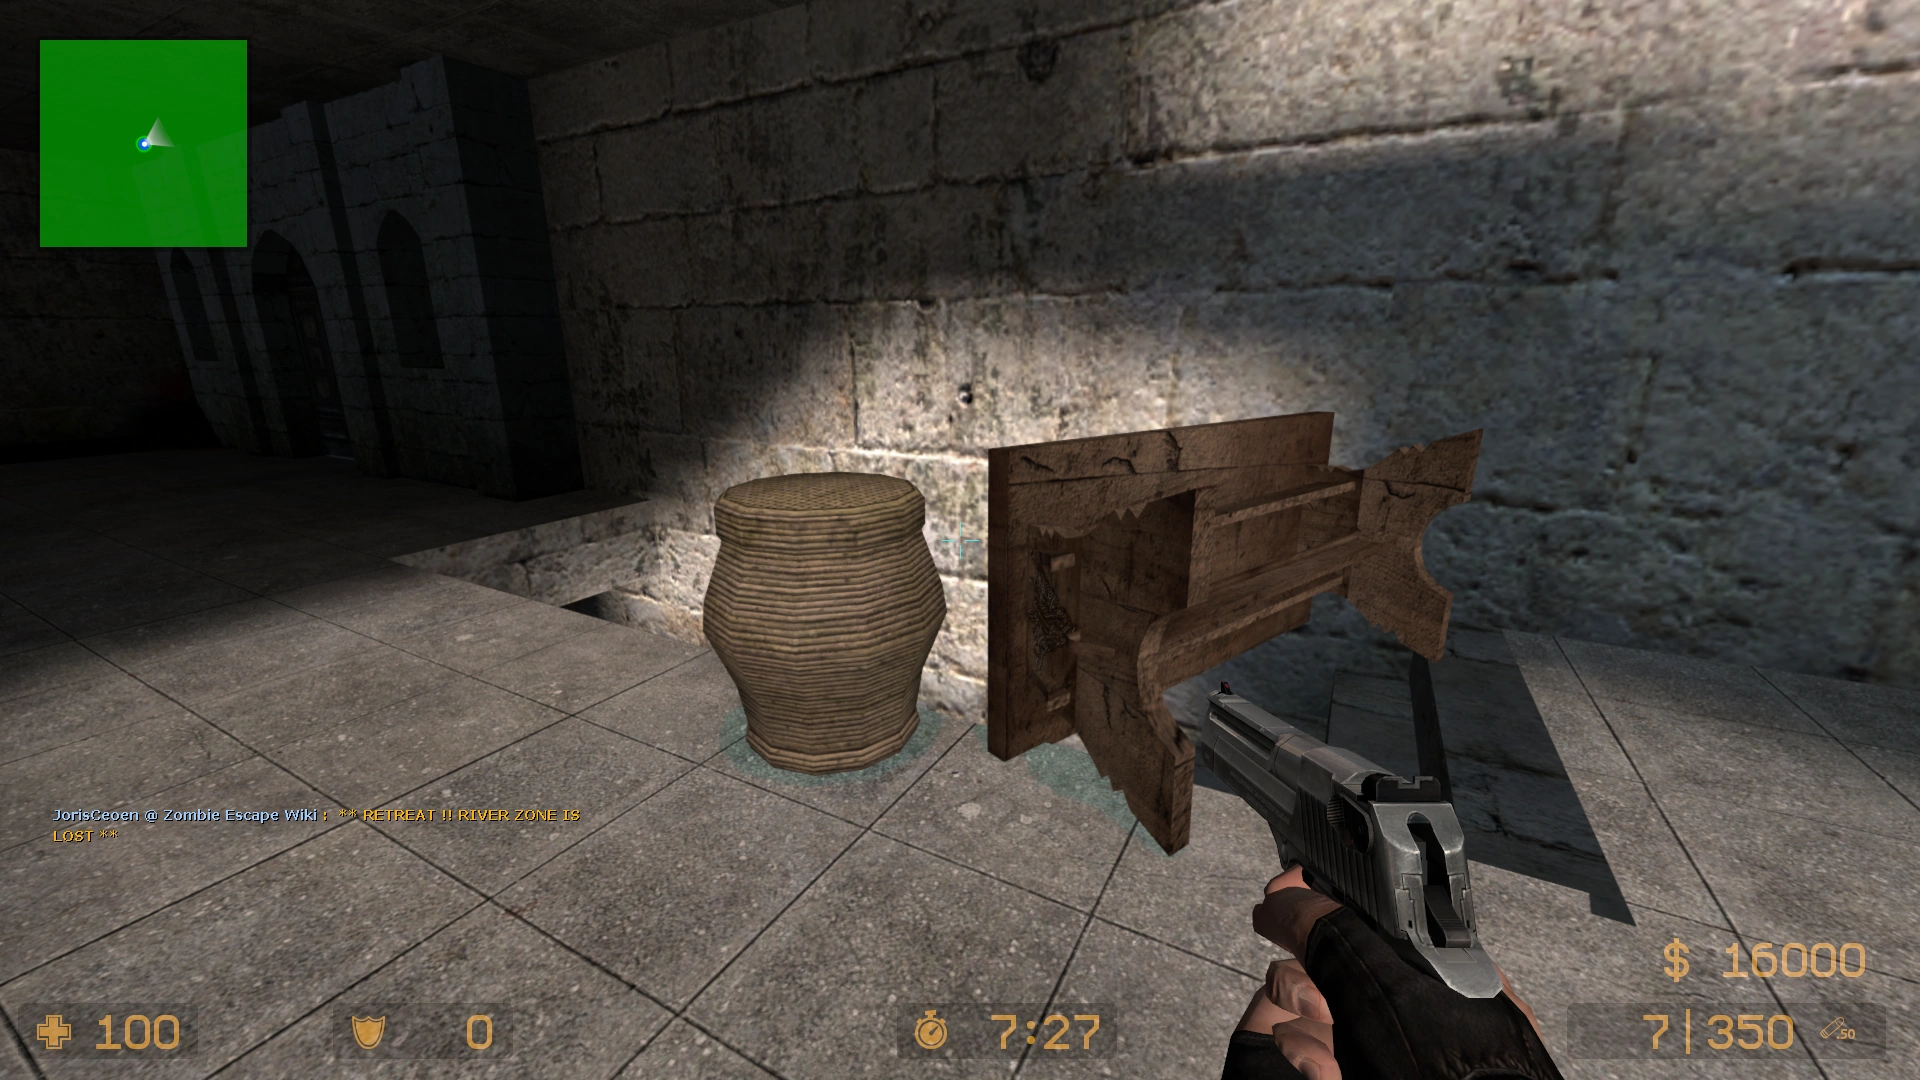 |
This is an alternative method, but the crate is more reliable.
Zombies can come to the first holding zone from 3 sides. Each of these 3 sides can be accessed by a door on every level of the fort. Any of the 3 doors open when a zombie runs near it (Humans can also enter the 3 doors, but all humans will most likely take the upper door to build a long distance between them and the zombies):
- If a zombie enters the door from the bottom level of the fort, he will be teleported at the left side of the next area.

|
Brings you to | 
|
- If a zombie enters the door from the middle level of the fort, he will be teleported to the right side of the next area.

|
Brings you to | 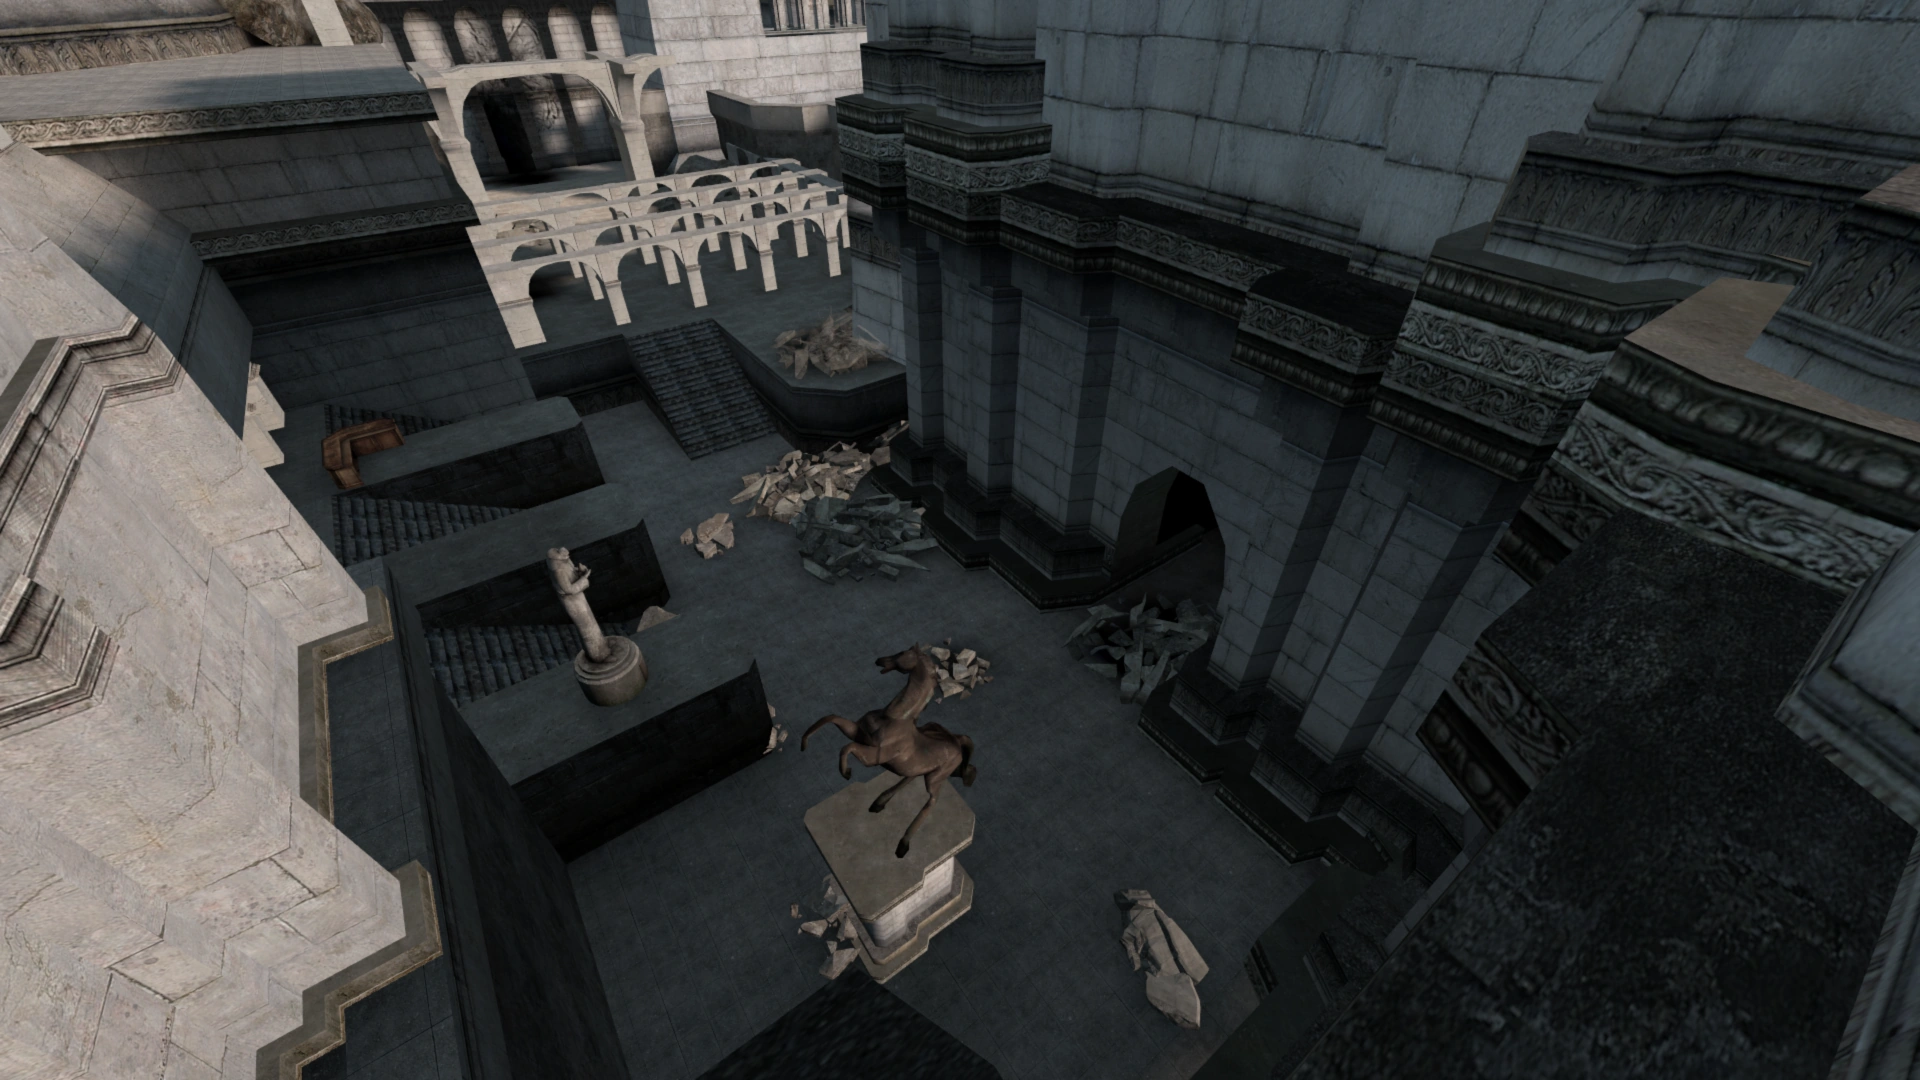
|
- If a zombie enters the door from the upper level of the fort, he will be teleported to the upper part of the next area.
|
Brings you to | 
|
Either way, they all lead to one central doorway and left and right from it 2 other smaller (sideway) doors.
It is advised to protect 2 doors (left + central), but most of the time, humans will all mob into the central doorway anyway.
To make it easy to understand, here is a picture of the next area, leading to the horses:
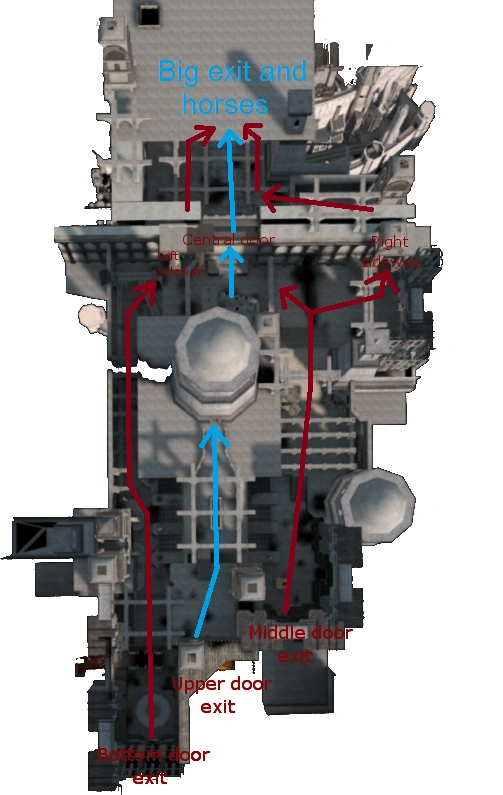
As you can see, humans should follow the blue arrow, zombies should follow any of the red arrows.
This is not obligatory though, all directions may be chosen by either humans or zombies. Also, note the right sideway being very far away from the central and left sideway. Humans will almost never hold there, so keep in mind when going through the central doorway to cover the right side! When zombies are near the central door, the 3 doors will open, be ready to shoot on zombies coming from the left door, because it open 1 sec before the central door.
Near the guards in front of the horses, to the right, there is a door which let zombies take a nazgul (3 in normal mode, 6 in extreme mode | 2, then 4 in the v3_3 because of a bug). You can avoid this by properly placing any box/prop you saved before.
 |
The crate you saved before will help you to build a long distance between the horses and the Nazguls
To take a horse, go on it, crouch, press E (default key to use), and spam your forward key. It will make the horse move at his max speed (then press D or A one time, to be able to move again without reducing horse speed). NOTE: There is a bug that allows nazguls to negate knockback, so the more you shoot the closer the nazguls get. If you see a nazgul moving diagonaly don't shoot until he's above you.
When you are on any of the horses, you will notice that Gandalf comes. After that you will be teleported right in front of Minas Tirith! When that happens, TURN AROUND IMMEDIATLY AND SHOOT!!!. It cannot be stressed enough! When everyone gets teleported (humans and zombies), humans will be a bit ahead of the zombies, but the distance is so short that if you do not turn around/cover fast enough, Nazguls will have caught up with the humans in seconds, guaranteeing a complete fail. (This is even more important in Extreme mode, where there are no less than 6 Nazguls.) But in the v3_3 Nazgul die after 2-3 seconds, letting you safe, but don't be happy, the cover is more long.
The door will open when humans reach them. When you are inside of Minas Tirith, place the bench forward of the guard, zombies will need to break it to kill the guards, and it will give you an easy win ! Keep firing until the doors are closed again, and that's it. You won stage 1!
2nd Stage: Main Gates (Normal Mode)[]
Take one of the three teleporters, they all lead to differents locations:
- The room with 4 windows, take the 2 barricades there, and barricade the door where you need to go.
- The top, take 2 blocks, and barricade the ladder of the "Siege Tower"
- The countyard with the horse statue, take every barricades you can, and put them on the guards who block the way.
When zombies passed the big door (from the room or the top), the Giant Battering Ram will break the door, and you all need to Fall back, to the guards. They will open the way after some seconds, so pass them. In the next area, there are 2 cades: the box + the bench:
- Put the box in the door, at the left of the guards, this will block zombies to be teleported in the Siege Tower.
- Put the bench on the guard, it's very needed, because a rock will fall on the guards (killing them) and kill people near. But with the bench on them, only the bench is destroy, and zombies still need to kill guards (so you gain time).
Once, the rock fell, climb the stairs, and don't forget to take the 3 hay bale stacks, you will need to put them on stairs when all humans climbed. At the top of the wall, follow the way, and take the 3 rocks. Put them, in the way, to block zombies. After about 20 seconds, the Siege Towers will break a little part of the wall, and let zombies join you. After that you can pass throught the guards, and pass the bridge.
Take the barrel, and the torch. Place the barrel on the bridge and set it on fire, with the torch. The barrel will explode and break the bridge after ~10 seconds. You can now enter in the room, and follow the way. You will arrive on a bridge (you can see below where you was before), open the door by pressing E on it. You can now take 3 ways:
- Open the second door, and take the upper way. This way is not the fastest, and you will get caught by zombies if you are too slow.
- Open the second door, and jump down (you can die if low HP)
- Take the right stairs, to go down.
For the 2 last ways, you need to break a part of 2 doors, and barricade them with the box and the shelf . Follow the corridor, to arrive to the last area, here you will need to defend as long as possible until the signal.
Go on the scaffolding, and take the 3 big rocks, barricade the stairs & the hay bale stack. You really need to keep 2 barrels, for the end... , so take 2 of them, and launch them far behind the guards.
When you hear the signal, the guard let you pass, open the 2 doors, and place the 2 barrels in them. Doors will close after 1-2 seconds, and so you win the stage 2.
3rd Stage: Catapults (Normal Mode)[]
All teleporters lead to the same area, so take the middle teleporter (zombies won't have time to kill you).
2 players need to take, the Oil and the Ammo Barrel.
The Oil, place 2 oils next to the 2 doors, and launch a grenade, to ignite it.
Then place the Ammo Barrel, to give unlimited ammo to Humans, and so they can launch nades. Try to not Fail Nade.
When you hear the signal, a part of the humans, take the Lift, and the second part, go in the tower at the left. They need to take the shelf, and put it in the stairs when all humans passed. Go in a window to join the lift, but if you take the last window (at the top), stay cover until the lift is at your level.
As soon as you get to the top of the lift, run straight ahead to the large gate. Don't stop, because some debris will fall, killing everyone under it. After the debris has fallen, run near the edge of it, and if you have the ammo barrel, place it there. If you have the oil vase, pour it at the sides of the debris field. While some people are defending, the rest of the team place some barricades on the way, and one player need to go towards the gate, climb up the ladder to the left, and run through the door and up the spiral staircase. At the top of the staircase, the player will need to press E on a lever. A message will appear, which said that the gate will open after 10 seconds, so fall back with your team.
Note: The player at the top (the room with the lever) can take the Toilet, hide behind 2 boxes.
When the gate is open, (don't hug on when it is openning, or you will die), then you can go to 2 locations:
- The Catapult 1 staircase: it's the first passage you can see at the right, just take it and climb the spiral staircase, and be sure one player activated the lever of the catapult at the very top. When all humans passed, use the barricade to block zombies.
- The Catapult 2 way: don't take at the right, but go to the scaffolding, you can climb up. Get to the top, and jump in the small room. If it wasn't done activate the lever for this catapult.
While you are waiting for the metal gate to open (once you activated the 2 catapults), don't forget the stairs of the Catapult 2 tower. Or zombies will erupt from it before the gate open.
Then, a big part of the team, cover near the boxes, by placing oil and ammo barrel there. The other part, take all barricades they can, and put them on the scaffolding (only the 2 rock block).
After some seconds:
- A rock fall on the Catapult 1,
- A rock fall on the Catapult 2
- A third rock slam into the door, across from the last tower, letting you enter in the building.
Attention: Don't Doorhug, or the 3rd rock will either kill you or block you in the floor. But the rock can be destroy if you shoot on it, when it come.
As soon as the third rock falls, everyone should fall back through the broken door. It a very good idea if some people put barricades where the door was, after everyone has passed through.
This next part can be made considerably easier with the aid of explosive barrels. There are two of them, one straight ahead from the entrance to the room, another on the right side staircase, against the far wall (The One you run towards before getting on the second set of stairs). The torch needed to detonate these barrels is on the right side, next to the door just after the first set of stairs. Two people get these barrels, and one person get the torch. Place the barrels on both sets of cracks and light them with the torch. After a short while they will detonate, and the cover become more easy. But don't be near the barrels when they explode, or you will die.
When the door open (after 35 seconds), fall back (don't take the door, without any guards, or zombies will catch you. You now need to climb up circular staircase, until you get to a door. Open it with E, and you will be in another countyard. Go to the door, and wait for zombies to be near you OR wait ~30 seconds. Depending of the number of humans alive, you should either stay cover with some barricades, oil and ammo barrel or directly enter in the big room.
Tip: When you enter in the room, check the timer, and count the timer - 70 seconds. Because the gates open 70 seconds after someone entered in the room. Example: I enter in the room at 2.35, so the gates will open at 1.25.
- +15 players: ~75% of players will stay cover, and put some barricades near the guards, it will be hard for zombies to pass. During this time, the other part will put all barricades they can find, on the way (stairs, on guards,..). But don't block completly the way, or the part of players who cover will break barricades to pass. Easy to win, by this way.
- -15 players: Put 2 barricades, on guards to gain time, then enter in the room, and put all barricades you can on the way OR use barricades to go on unreachable area for zombies, but be sure to check the timer (read Tip), and pass the gate at good moment. You can easily win the round if you use Smokegrenade or Hegrenade.
When the gate open (choose 1 of the 3), quickly spend it, and repel zombies, because if they reach the middle of the corridor, the gate of the last rooms will start to close. But if you can enter in the final room, zombies won't be able to win (in Extreme Mode, a Troll + a Balrog, can make zombies enter in the final room, and so glitch the end of the round). Nuke will be launch some seconds after gate are closed, and so you win the stage 3.
4th Stage: Last Stand (Normal Mode)[]
3 players need to take, the Oil, the Ammo Barrel and Gandalf. Others items can be take to get more hp and repel zombies.
The teleporters lead to 3 differents areas (the same rooms of the 3rd stage end):
- Left Teleporter: You appear in the right room, the wooden door will open, go there, and put a grid on the way (you can find 3 grid in the next room), to block zombies and gain time, or they will kill all humans coming from the Middle Teleporter. You can now take the stairs, to go at the top of the library, and wait for a door to open (it can be good if you drop a torch at stairs, because it will be very hard for zombies to go up), or join the humans from Middle Teleporter by taking the door in front of you (see the 2. for the way). If you took the stairs, wait for the door of library to open... When it's open, enter and follow the corridor to a next door, with some plank as barricade, so place them on the way, to block zombies coming. Attention, zombies coming from Right Teleporter can reach you from the other side of the corridor (divided into 2 corridors by bookshelf). When the door is open, break a wooden door (you will join the players who took the Middle Teleporter) or take the right way (don't forget to take some torchs to repel zombies).
- Middle Teleporter: You appear in the main room, press E on the door to open it, Gandalf should stay here with Oil who place oil on the ground, and will launch his grenade after Gandalf Attack is done. So Gandalf, do a Right Click when the first zombie is teleported (the grid break 1 second after), and will use DAWDS. If used with good timing, the General Teleporter will teleport AFK + players who wait at spawn (smart zombies wait for DAWDS to be finised before getting into teleporter), and DAWDS will repel all these players. Then Gandalf can fall back and join other players... In the library, go up on the bookshelf (= ladder), then the second, to go down stairs (take the torch here), you should now take some barricades and next go at the right to the Spiral Staircase. Climb it and pass the little bridge... Here take a torch and drop it near the door at the right, to repel zombie coming from there. Take also the 3 nearby rocks, you should place on the way. When the Fall back appear in the console, go up and follow the way, you will meet the players from Left Teleporter, take all torchs and place oil at the door. Some players stay cover here during some seconds, and then join the group in the middle of the Dark Room.
- Right Teleporter: You appear in the left room, press E on the door to open it, you will be in a little library, follow the way until you get at the top left of the big library. Go to the door, and when it open, you will be in the left side of the library corridor (zombies don't often take this way). Once the door open, go up stairs, and you will be in the Dark Room.
- All Teleporters, now
In the Dark Room (use Torch to see), go on the stack of boxes (use haystack) and cover ~30 seconds. The Ammo Barrel should be placed here, to repel zombies coming from the haystacks (or the Zombie Ladder), when there are too much zombie around the boxes, Gandalf need to perform DAWDS (attention, if you use it too late, you will give zombies advantages). Once the roof broke (not always the same area that break), Gandalf use the Light, to push zombies away from your teammates, and run with humans to the wall (a zombie pusher don't let them to go to the wall during some seconds). Climb at the top by using crouch-jump, crouch-jump, crouch-jump, etc... If there is a horse, he should quickly climb up to go to the next cover area (and gain time). A player need to stay with a rock, until the ladder for zombies appear, to prevent them using it until they break it (if they stack on it, they won't be able to break it (except with a Troll)).
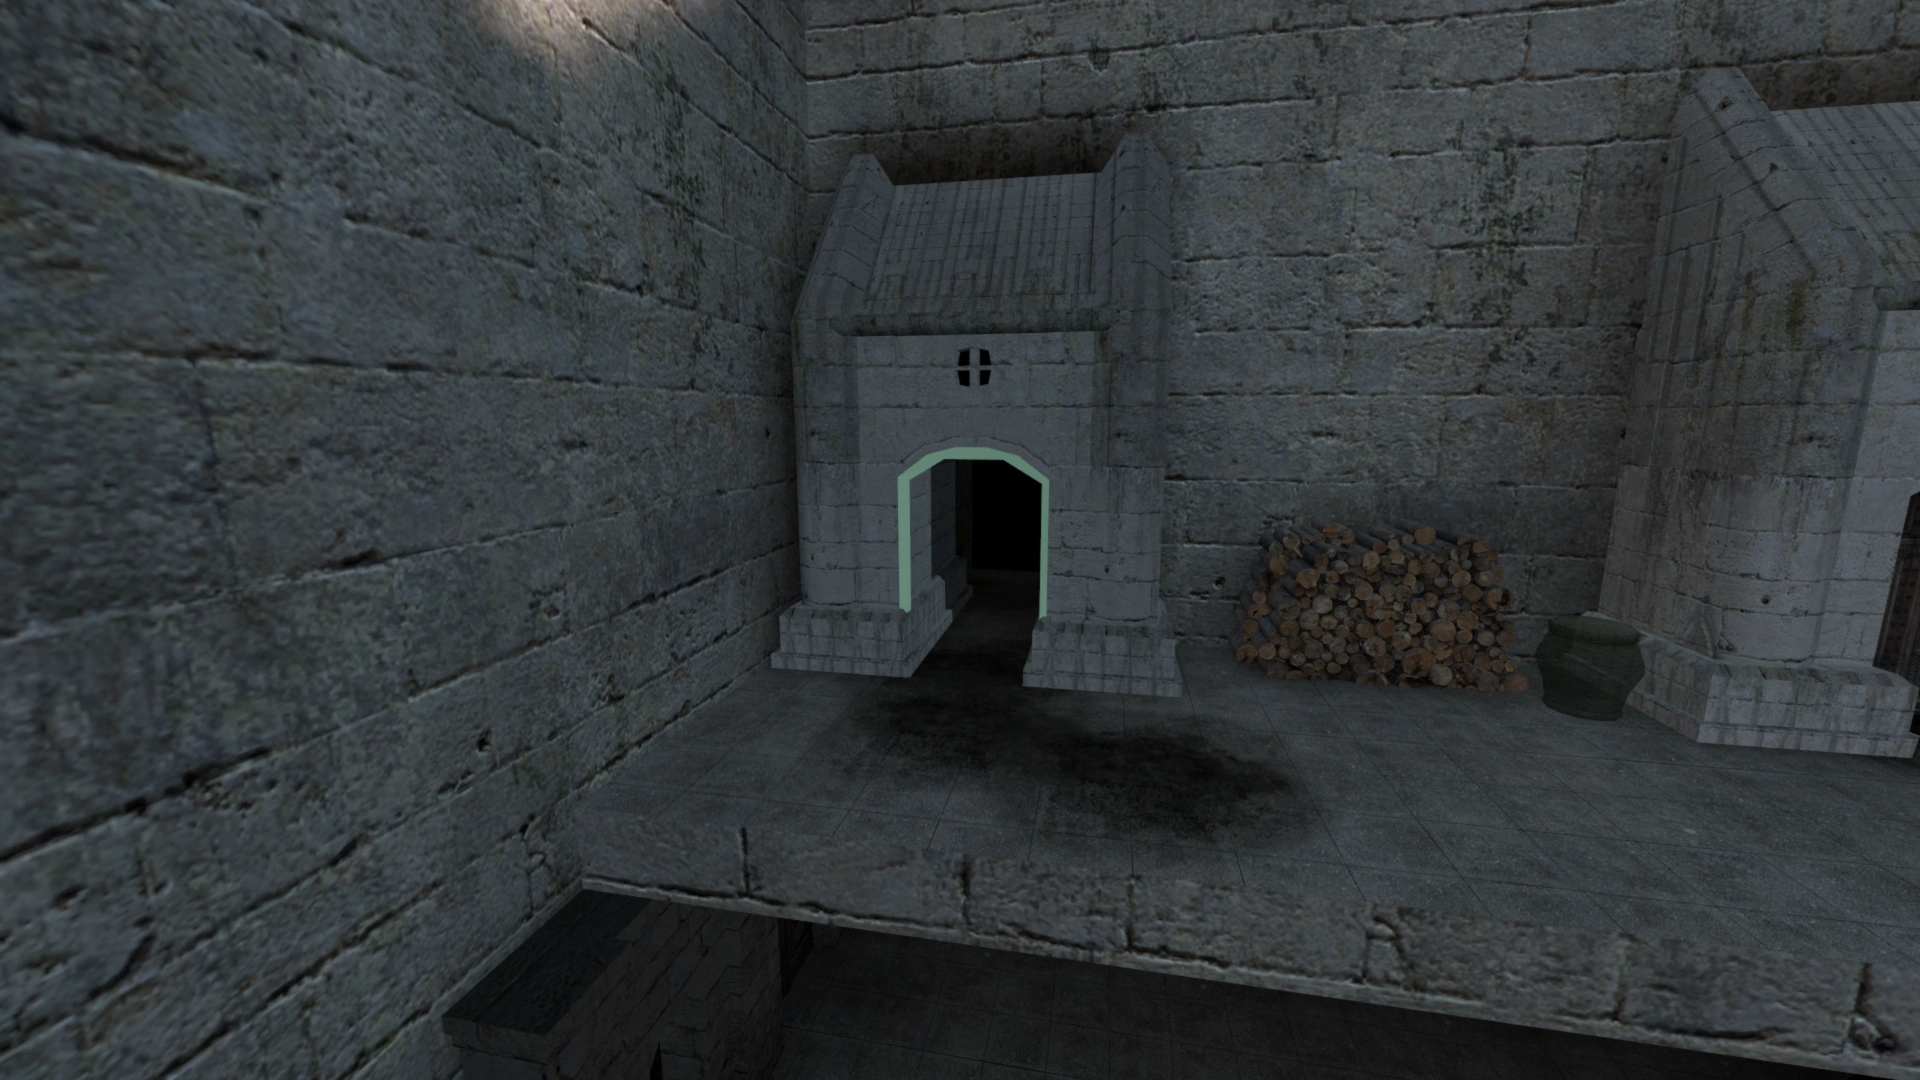
Go up the spiral staircase, and then take the door at the first floor (if you can, drop a torch on stairs, to repel zombies climbing), you will be in a countyard, open the wooden door by pressing E (default "use" key). Go near the stairs, to activate a timer until the door open, and cover with some barricades (block the path with rocks). Tip: You can create a shortcut, with barricades to go to elevator area without waiting for door to open. The best way to do it, is using the 2 wooden bench + the hay bale stack. Once the door is open, Gandalf need to use the Light + DAWDS, to push zombie out of the way. The other players can either take the slow lifts and repel zombies climbing OR take the ladder (if you know how to climb it fast). Place some big barricades, on the way to gain time. At the top, you will see a big door and a wooden Ramp, take it and pass the archway... By now, you should see a timer at the bottom right of your screen that says GHOST ARMY ARRIVES IN (Time) This is the countdown to the end of the stage.
Take all barricades you can and place them near the big door, then go at the next door and place some barricades around the guards. Zombies will take time to break barricades unless they have the Zombie-Barrel and/or the Troll. Once the door is open (when countdown is at ~85 seconds), go up, during this time Gandalf need to stay at the door to repel zombies if they come (if no zombies, he need to go up or he will die). Place a barricade on the Glowing portal, because it allow 3 zombies (2 zombies in v3_3) to take the Nazgul.
At the top, hide somewhere, OR stay with your teammates in circle and repel zombies you can (hard to survive). Once the countdown is finish, the Ghost Army appear and kill all zombies, so you win Stage 4.
Note: If the last human die at the LAST SECOND (often happen), you will still win the stage, but nobody will get point and so get a level.
You restart at Stage 1 but with EXTREME MODE, and it will be more hard.
Extreme Mode Specification[]
- Constant Meteor Enabled: Every 5 seconds, a Meteor will fall on a player, losing some HP or dying directly (if he don't move). You can see it because of a red light surounding the player.
- Fast Zombie Spawn: Instead of spawning after 10 seconds, zombies spawn after 3 seconds !
- Fast Zombie Respawn: If they die, they respawn after 3 seconds instead of ~25 seconds
- ColorCorrection Enabled: type in the console mat_colorcorrection 1 to get blue effect on the wall, in the sky, etc...
- New items for Humans and Zombies: The White Knight and The Balrog
- Number of Nazgul in stage 1 & 4 increased (6 instead of 3)